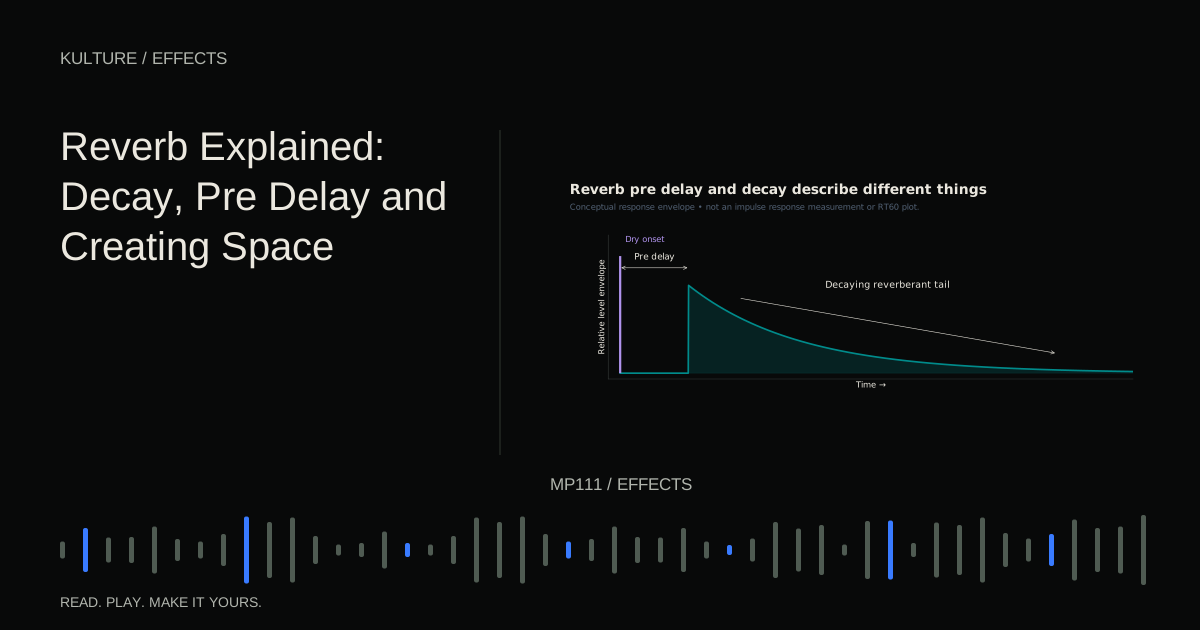
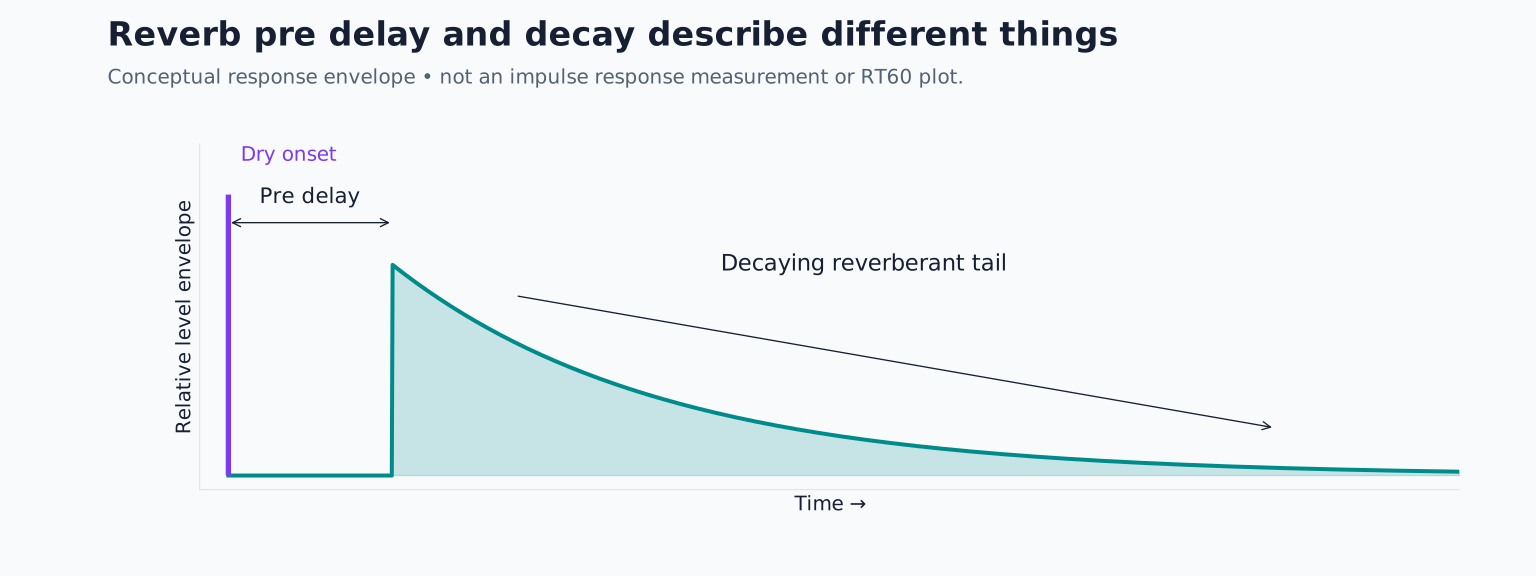
Decay controls how long the reverberant energy lasts. Pre delay separates the source’s beginning from the onset of the reverb. Early reflections help define the initial spatial impression, while the later tail supplies sustained ambience. These controls interact, so a longer decay is not the only way to make a sound feel larger.
Hear the dry source first
Use a short pluck playing one note per beat at 100 BPM. Choose C, E flat, G and B flat across one bar, then leave the next bar empty. The empty bar lets you hear the tail without new notes covering it.
Disable other effects and set the source to a comfortable level. Add a reverb with a modest decay, perhaps 0.7 seconds for the first comparison. Raise the wet amount until obvious, then lower it until the original note remains easy to follow.
Now increase decay to around 2.5 seconds while leaving the amount similar. Listen to how the empty bar fills and how consecutive notes blend. These values are contrasting examples, not recommended settings for every song.
Valhalla’s reverb control explanation provides manufacturer context for decay, pre delay and the balance of early and late reverberation.
TRY IT HERE
Place a sound in space
Compare the dry sound with a generated room impulse.
Ready when you are. Audio starts only when you press Play.
Keep experimenting in the synth LabDecay is about the arrangement’s available time
A long tail may be beautiful when a note is followed by silence and distracting when the next phrase begins immediately. Judge it against the actual rhythm and harmony.
At 100 BPM a beat lasts 600 milliseconds. A two second tail spans more than three beats, though the audible decay is gradual rather than a hard stop. Several notes can therefore contribute overlapping reverberation before the first tail fades.
If a chord change sounds cloudy, shorten decay or reduce the send before removing body from the dry instrument. The old harmony may be continuing through the effect. A reverb does not know which chord belongs to the next bar.
Some reverbs define decay using a specific attenuation time, while others offer more abstract controls. Do not assume a displayed two seconds produces identical perceived length across algorithms or source sounds.
Use pre delay to preserve the beginning
Try pre delay at zero, then around 25 milliseconds, then around 70 milliseconds. Listen to the gap between the dry pluck and the apparent space. A little separation may make the attack clearer; a longer gap may start to resemble a distinct echo like event.
Pre delay can help a lead remain forward while still having a large tail. It does not make an excessively loud or long reverb disappear between notes. If the arrangement remains crowded, reduce the actual wet energy.
You can relate pre delay to tempo if useful, but it does not need to be a musical subdivision. The desired articulation and the reverb’s character matter more than making every timing parameter mathematically synchronized.
Shape the reverb’s tone
A bright tail can extend consonants, hats and pick attacks. A darker tail can sit behind the source more easily, but too much dark low mid energy can create mud. Listen to the return separately for diagnosis, then make the final decision in the mix.
Use damping controls, if available, to change how different frequencies decay. This is not always the same as placing an EQ after the reverb. Damping changes the tail’s development; output EQ changes the level of frequency regions in the resulting signal.
For the pluck example, reduce excessive low energy in the return and compare. Stop before the space becomes thin or disconnected. If the reverb’s high end competes with the lead, darken the return rather than automatically darkening the dry lead.
Choose a space by behaviour, not prestige
A room like setting often gives a compact spatial impression. A hall can provide a broader, longer ambience. Plate and spring models have characteristic textures that need not imitate an ordinary room. Algorithmic and convolution reverbs use different methods, and neither category is universally more realistic or useful.
Convolution commonly uses an impulse response, a recording or representation of a system’s response, to impose a particular reverberant character. Algorithmic designs generate their behaviour through networks of processing stages. Both can be used creatively beyond natural spaces.
Audition a few contrasting types at comparable wet level and decay. Otherwise the longest or loudest preset may win for reasons unrelated to its suitability. Choose the one whose reflections and tail complement the source’s rhythm and tone.
A shared return creates a controllable space
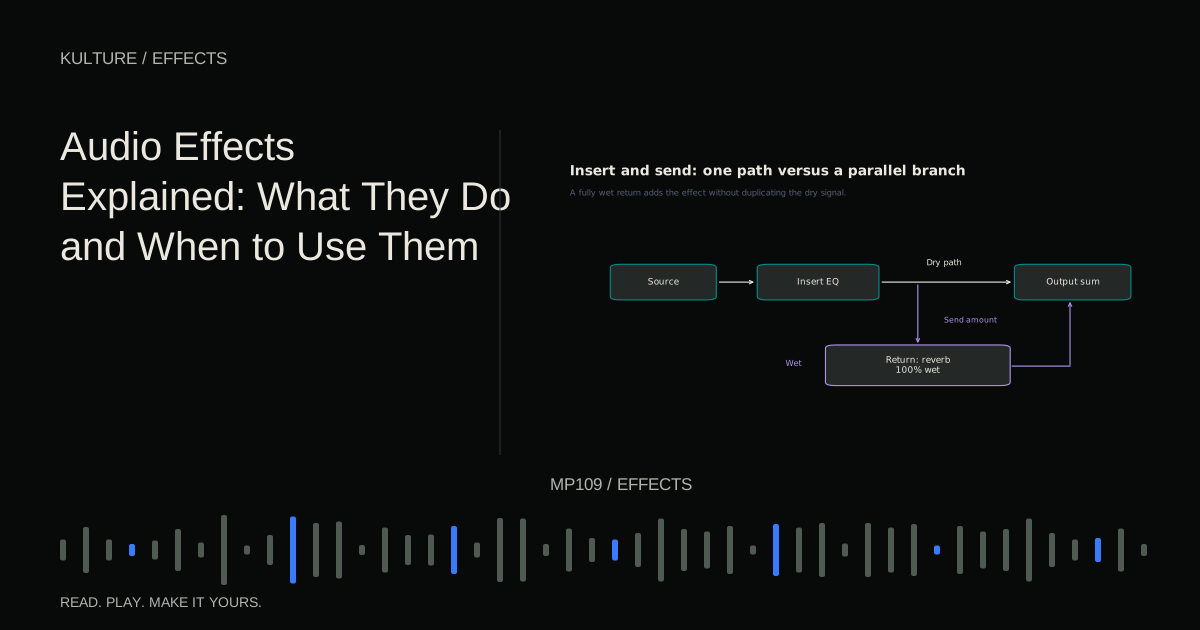
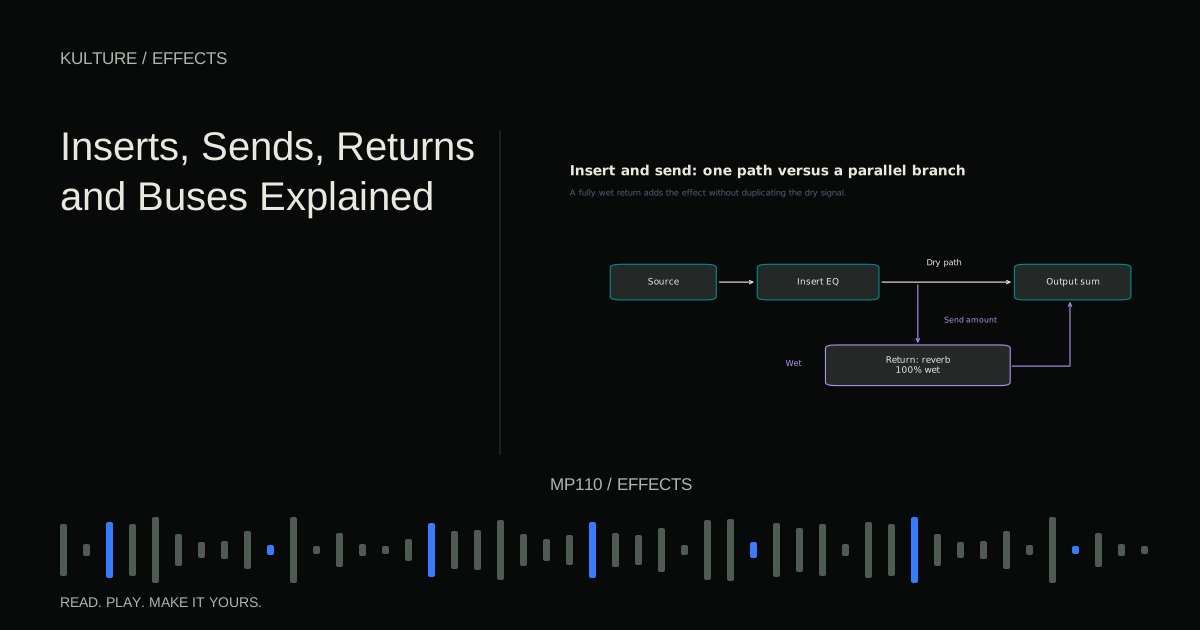
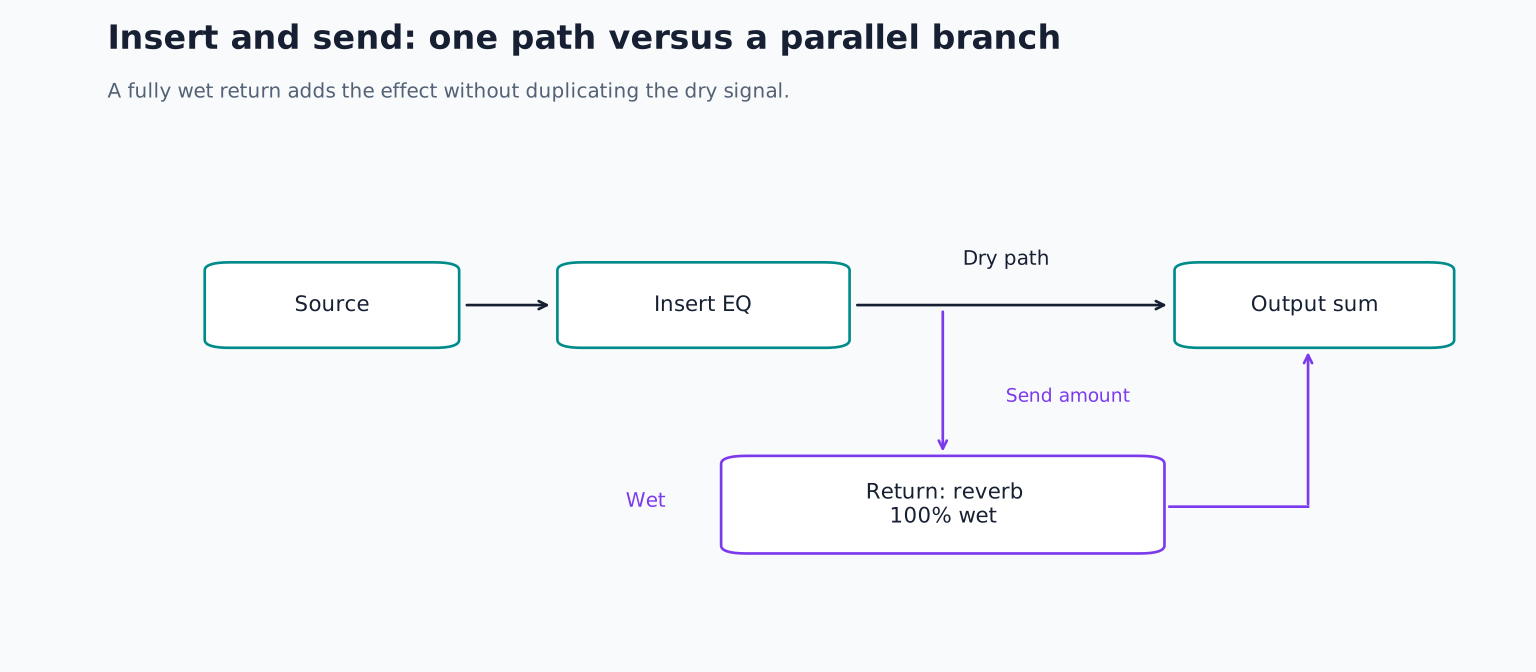
Put reverb on a return and set it fully wet. Send different amounts from a snare, lead and chord track. Their dry signals remain on their source tracks, while the return supplies the shared space.
This lets you change the overall ambience with one return fader while preserving individual send proportions. It also makes it easy to EQ or compress the effect separately. Learn the setup in inserts, sends, returns and buses.
Use less send on a source that needs to remain close and more on a background texture, then listen rather than treating those positions as a physical distance formula. Level, brightness and attack also influence perceived placement.
Automate space instead of leaving it constant
Try sending only the last pluck of a phrase into a longer reverb. The tail fills a gap without covering every note. You can also lower the reverb during a dense section and let it bloom during a break.
If using a compressor to duck the reverb from the dry source, keep the effect gentle initially. The source triggers reduction while active, and the tail returns afterward. Too much ducking can make the space swell unnaturally or reveal noise.
A simpler send automation curve often achieves the intended result without extra dynamics processing. Choose the method you can understand and revise easily.
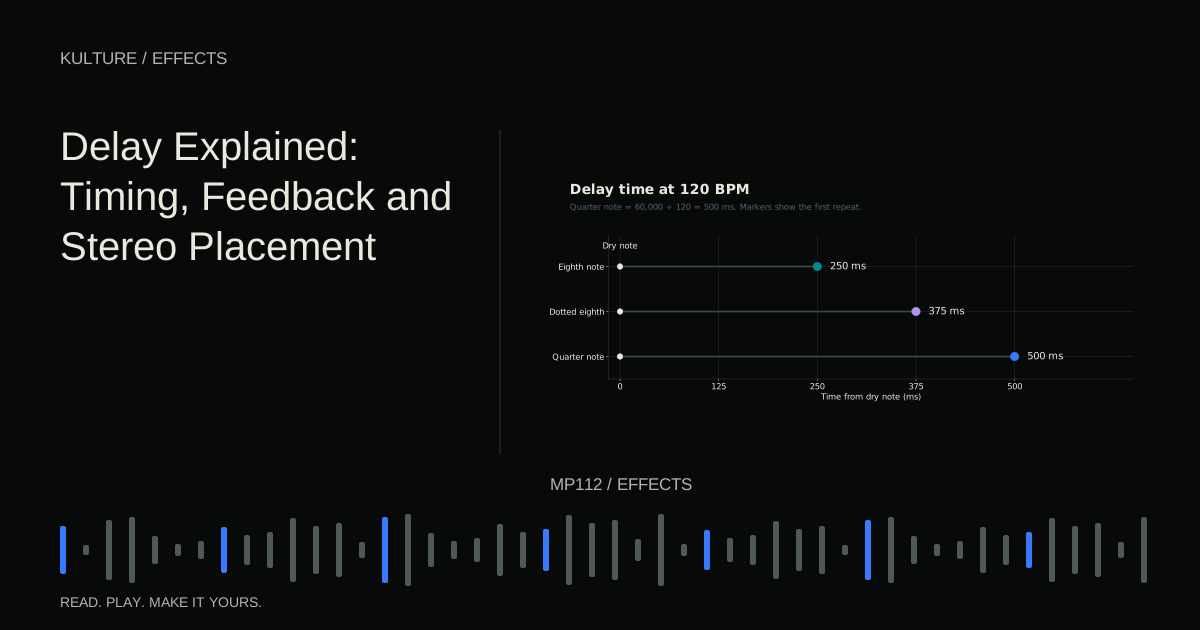
For practice, make one close, one medium and one distant feeling version of the same phrase using wet amount, pre delay, decay and tone. Keep the dry performance unchanged. Explain what changed in each, then compare with delay, which can add space through distinct repetitions rather than a diffuse tail.
TAKE IT INTO YOUR OWN MUSIC
Your next session.
Try sending only the last pluck of a phrase into a longer reverb. The tail fills a gap without covering every note. You can also lower the reverb during a dense section and let it bloom during a break.
Notes and progress stay in this browser.