To make it work in a track, verify its tuning, control how notes begin and end, write a clear pattern, and decide how it shares space with the kick. Distortion and slides are optional musical tools, not requirements.
Understand which kind of 808 you have
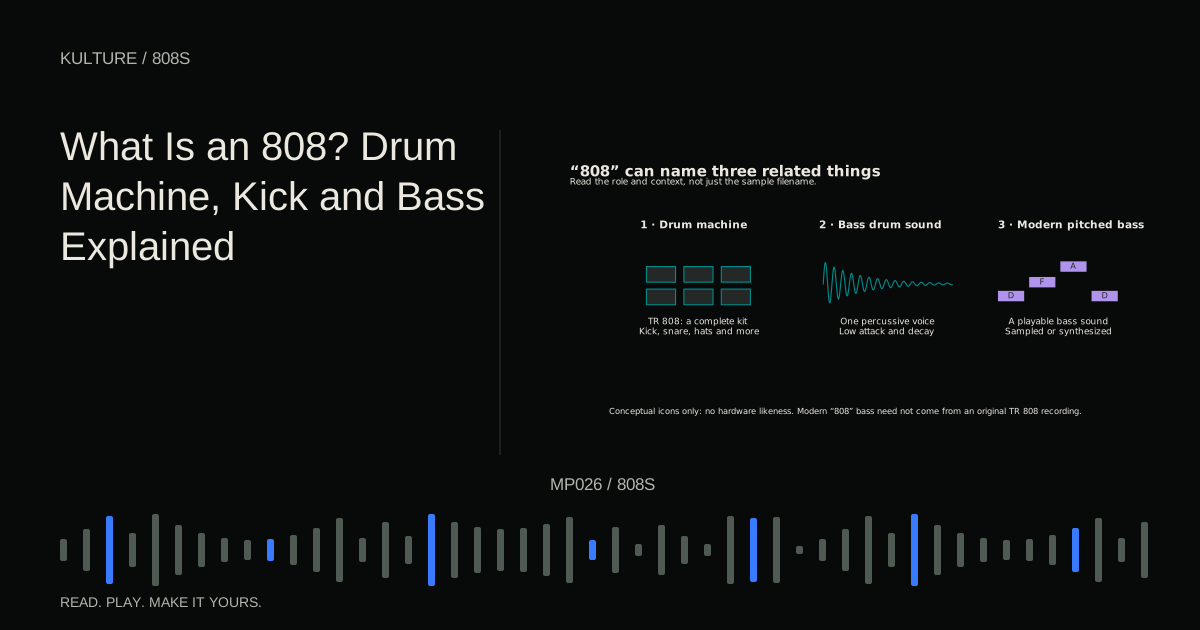
The original TR 808 was a drum machine with several percussion voices, not just one bass sound. Roland's TR 808 history describes its analog sound generation approach. Modern 808 bass production extends that legacy through sampling and synthesis.
Your file might be a short kick, a long decaying boom, a sustained bass sample, or an already distorted and pitched phrase. These require different treatment. A short kick may not provide enough stable pitch for a melodic line. A long bass sample may already have the attack and saturation you need.
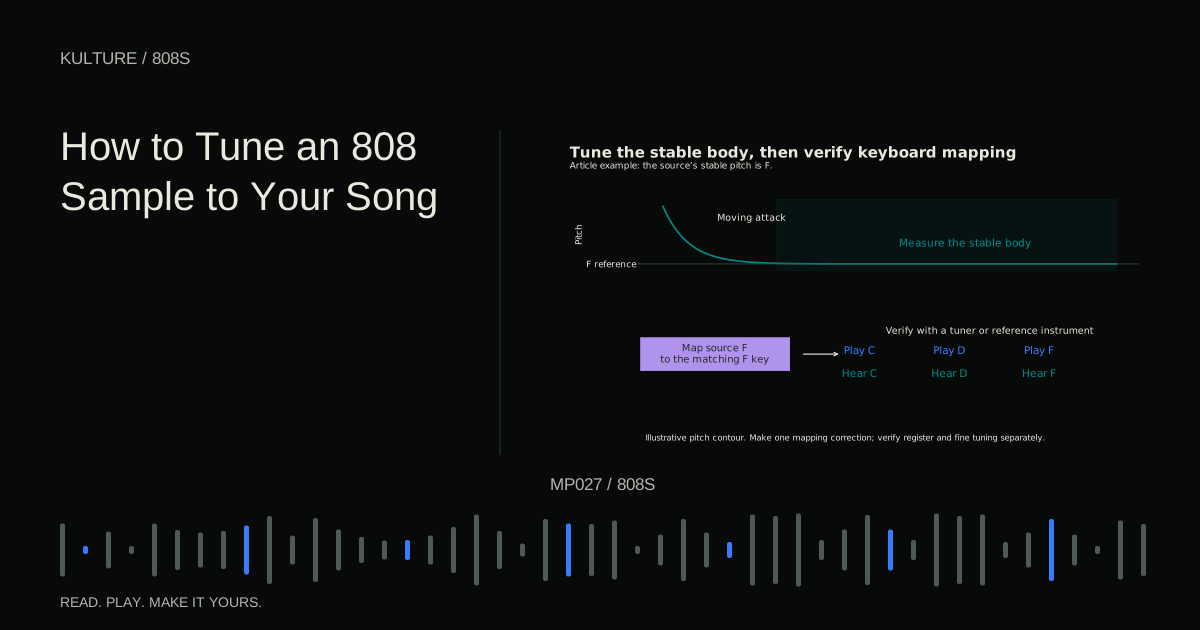
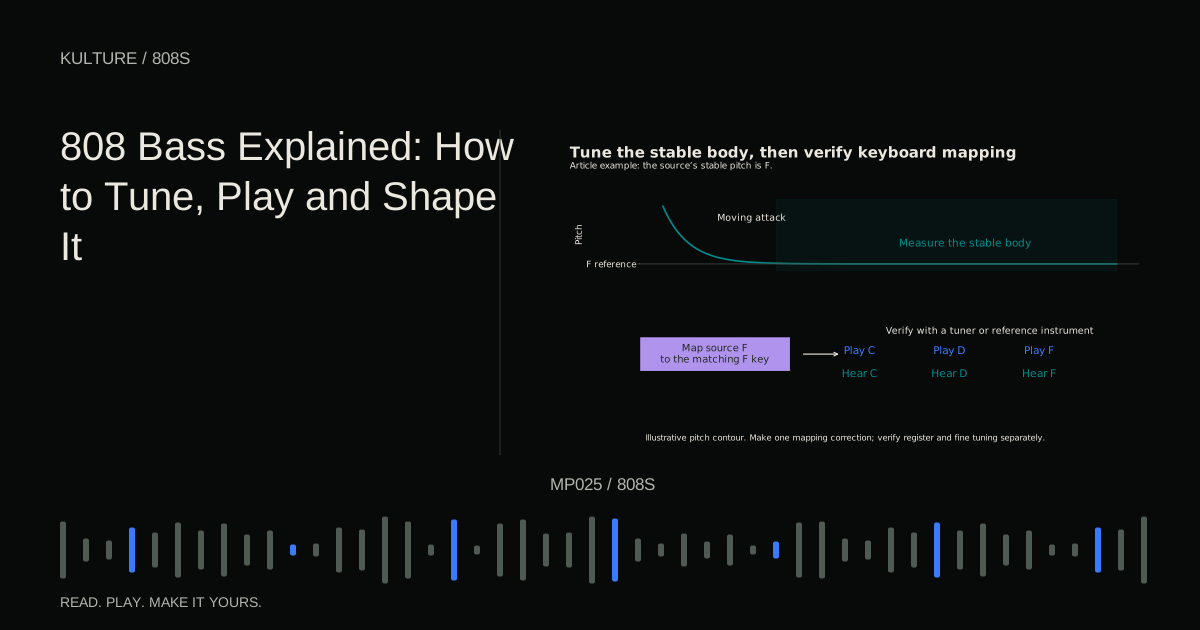
Listen to the sample alone at a comfortable level. Identify its initial transient, the low body after the transient, and its tail. If you hear a pitch drop, distinguish the moving attack from the more stable portion that follows.
TRY IT HERE
Give the bass some space
Tap steps to add rests. Change the register or slide.
Ready when you are. Audio starts only when you press Play.
Keep experimenting in the synth LabPut the sound into a playable instrument
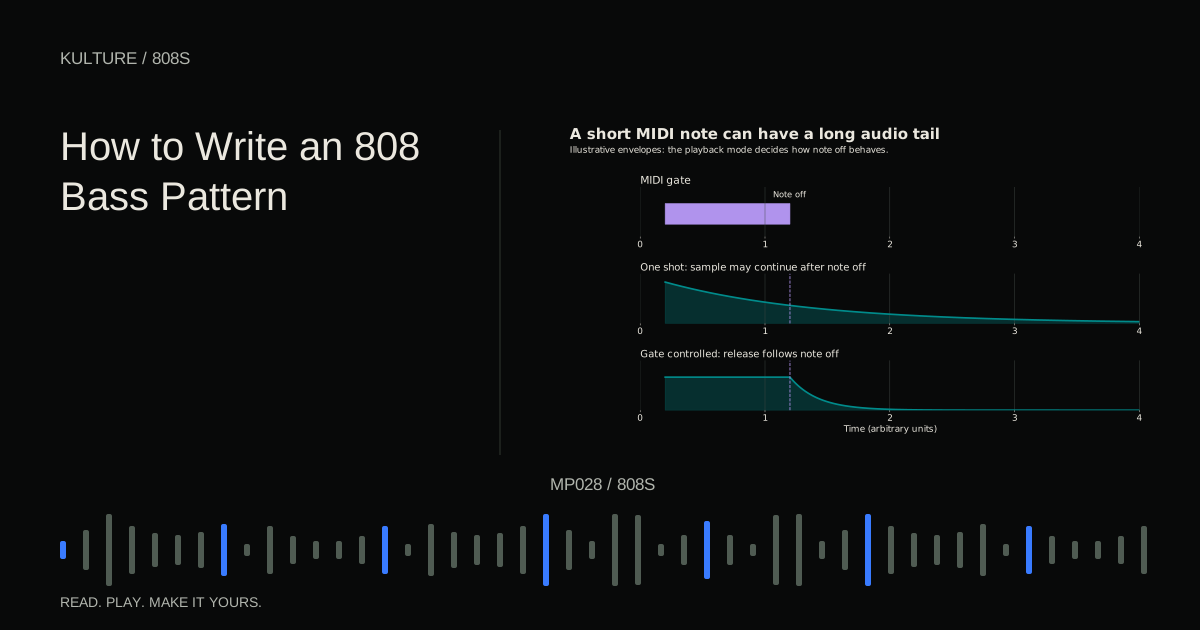
Load the sample into a sampler that can track MIDI pitch. A drum pad that merely triggers one fixed pitch is not enough unless you only need that pitch. Choose a mode that lets MIDI notes control the sound's duration if you want short and long notes in the same pattern.
One shot playback often continues after the MIDI note ends. Envelope controlled playback can respond to note off, the message telling the instrument that a note has ended. Different instruments use different labels, so consult their manuals.
For example, Image Line's Sampler documentation notes that samples can continue after note release unless a volume envelope is enabled. That is a product specific implementation of a general distinction: triggering a sample and holding a playable note are not always the same behavior.
Verify the root mapping
A sampler's root key is the MIDI key that plays the source at its intended reference pitch without the corresponding keyboard transposition. The filename may suggest a note, but verify it.
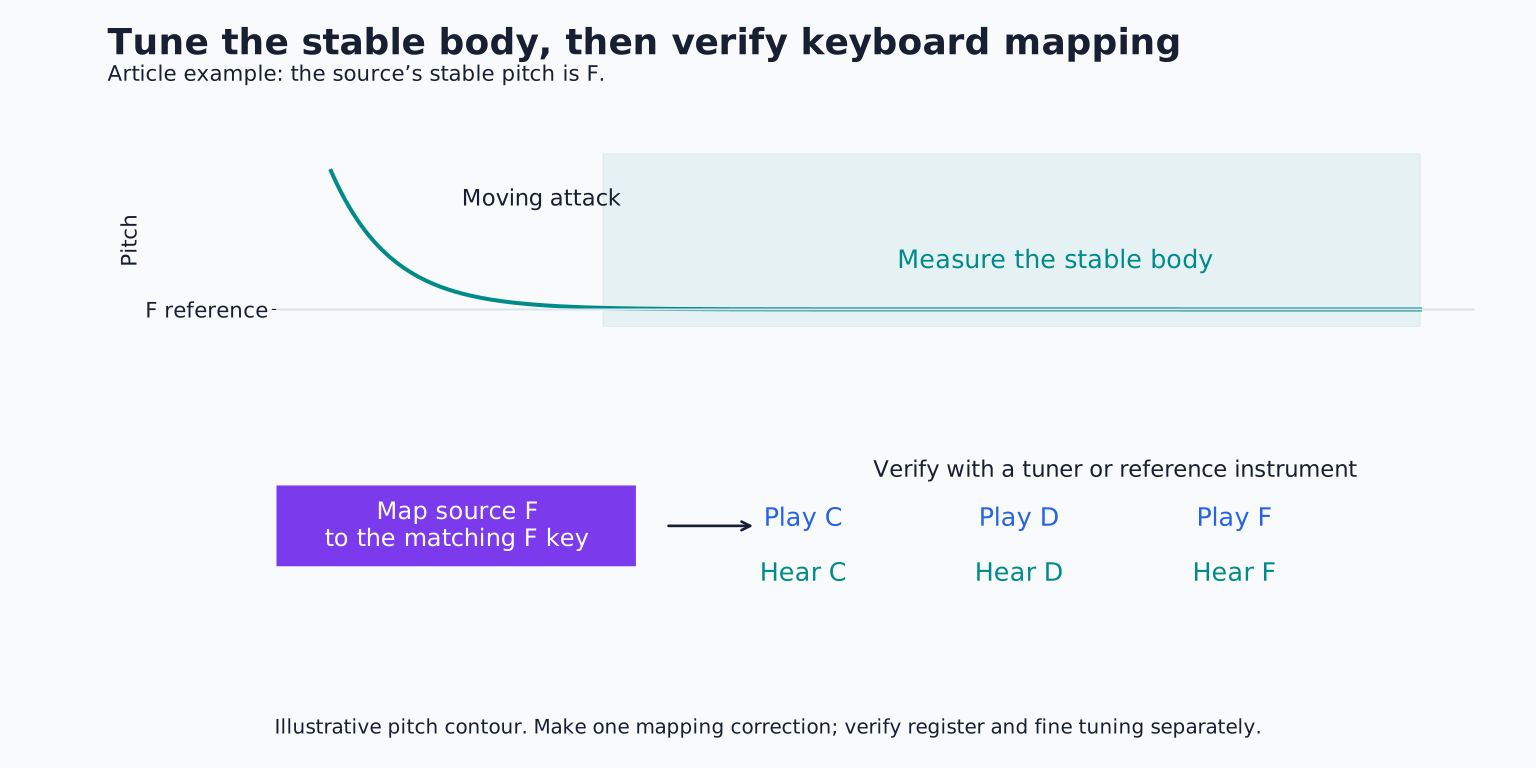
Use a tuner on the stable tail, not only the attack. A falling pitch transient can confuse the reading. If the bass is too low for reliable detection, temporarily play it an octave or two higher, then account for that octave when checking the result.
Suppose the stable source is F. Set its mapping so an F key produces F at the intended register. Depending on the sampler, this may involve assigning the source's root key or adjusting transposition. Do not do both blindly, because the two corrections can cancel or double each other.
Then play C, D and F and verify their sounding pitch. The goal is straightforward keyboard tracking: the written note should produce the intended pitch class. How to Tune an 808 Sample gives a more detailed verification procedure.
Choose a register that communicates the line
Lower is not automatically heavier in a useful way. Extremely low notes can become indistinct or consume headroom without clearly communicating pitch. Try the line in two adjacent octaves and choose the register that supports both weight and definition.
As an exercise, use D minor and compare a D at MIDI note 38 with D at note 50. These are an octave apart. The lower version may suit a deep foundation; the higher version may reveal the melodic contour more clearly. Your sample's harmonics and playback system affect the result.
Do not turn the volume up dramatically just because one low note is difficult to hear. Compare on a familiar system and consider a different sound or some controlled harmonic content.
Shape attack, sustain and release
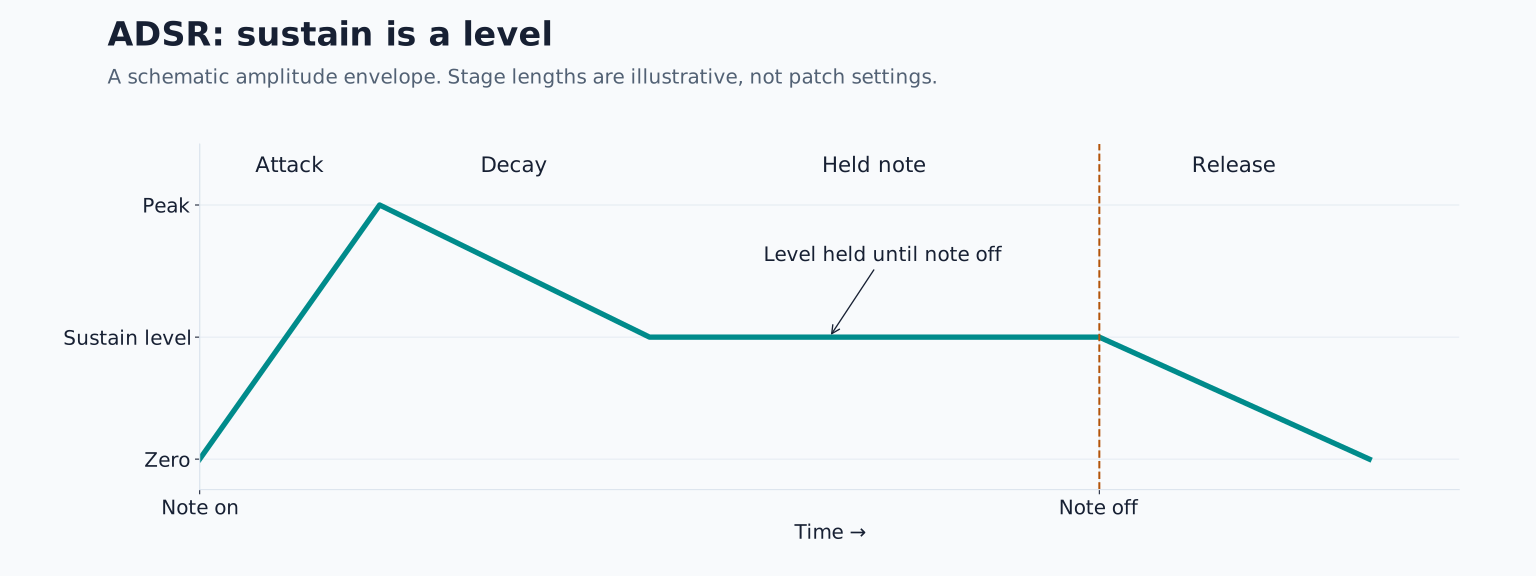
An amplitude envelope controls loudness over time. Attack is the rise at the start. Decay describes the movement down from the initial peak. Sustain is the level maintained while held, when the instrument supports it. Release is the fade after note off.
For a simple sustained bass exercise, use a short attack that avoids an unwanted click, a sustain level that keeps the body audible, and a release short enough to make rests clear. There is no universal millisecond value: waveform phase, pitch and the desired articulation all matter.
A sample cannot sustain beyond its recorded material unless it loops, stretches or uses another suitable mechanism. Raising sustain on an envelope does not create missing audio. If a note ends early despite a long MIDI rectangle, inspect sample length and loop settings.
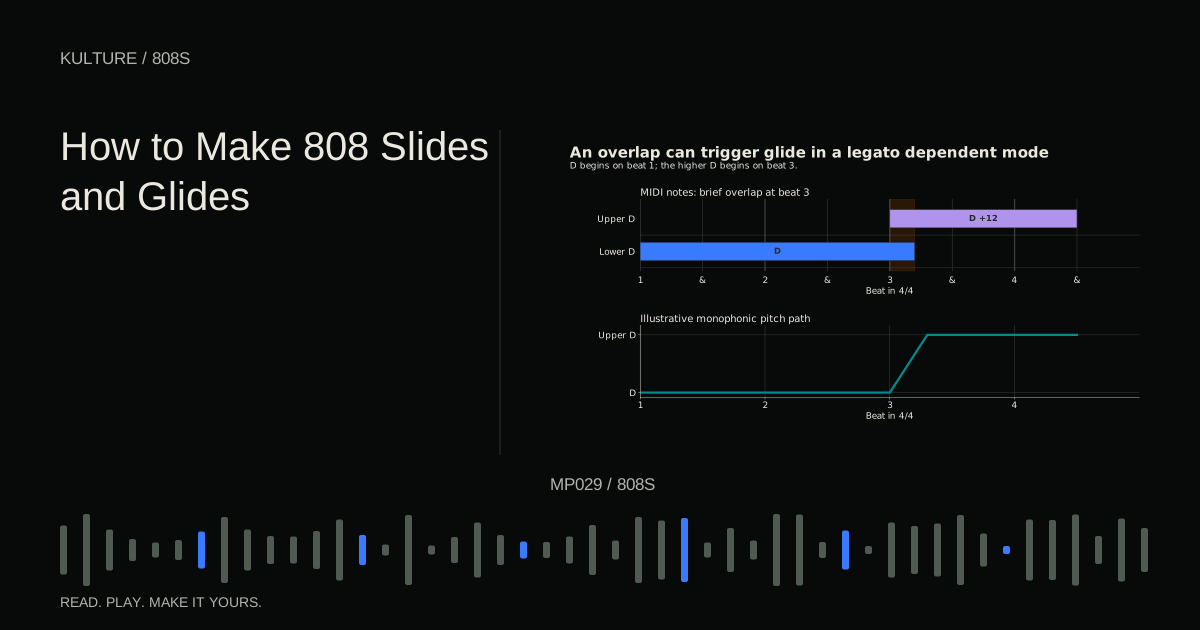
Start with one voice if you want a single bass note at a time. Then check whether new notes retrigger the attack or connect legato, meaning they join smoothly. A monophonic setting alone does not guarantee the desired envelope behavior.
Write a clear four bar pattern
Use Dm, B flat, F, C, one chord per bar, at 140 BPM in 4/4 with a half time drum feel. The tempo is an illustrative workspace, not a required style setting. Put the main snare on beat 3.
Begin with root notes D, B flat, F and C at the start of each bar. Hold each for two beats. Then add a shorter root on the “and” after beat 3, ending before the next bar.
The long note establishes harmony; the short note adds a response. Keep the pattern simple while checking tuning and tails. If a kick hits with the first note, listen for a clean combined attack. If the second note overlaps the next chord, shorten its release.
In bar 4, try a short C on beat 4 leading back to D. Do not add a rapid roll merely because 808 patterns often contain one. The pattern should fit your drums and lead.
Add a slide only where it says something
A slide, or glide, is a continuous pitch transition between notes. Many instruments offer portamento controls, but their triggers differ: some glide on every note, some only when notes overlap, and some use special per note instructions.
Try a single slide from D to the D an octave above near the end of a phrase. Begin with a moderate glide time and adjust until the destination is heard clearly. If the destination note is shorter than the slide, the sound may never arrive before ending.
Do not confuse pitch bend with ordinary note mapping. A pitch bend message changes pitch relative to the current note and has a configurable range. A glide uses the instrument's note transition behavior. Both can create movement, but their programming differs.
See How to Make 808 Slides and Glides for controlled tests rather than universal menu instructions.
Use saturation to add audible character
Saturation is a form of nonlinear processing that can add harmonics above the fundamental, the lowest principal pitch component. Those harmonics can help the bass's rhythm and pitch remain perceptible on smaller playback systems.
Start with a small amount and compensate output level when comparing. If the processed version is simply louder, it is difficult to judge whether its tone improved. Too much distortion can flatten attacks, emphasize unpleasant upper frequencies or make the 808 compete with the lead.
You can also choose a sample that already has suitable harmonics. Processing is not mandatory, and adding saturation to an already heavily distorted file may make it less controllable.
Decide whether the 808 needs another kick
An 808 with a strong transient may already supply both impact and bass. Adding a separate kick can strengthen the attack, but it can also create a crowded low end. Choose a complementary short kick if you need one, rather than layering another long boom automatically.
Compare three versions: 808 alone, kick and 808 together, and kick followed by a slightly later 808. Keep the musical timing sensible and listen across the whole phrase. Kick vs Bass explains why note lengths and source choices should come before automatic sidechain processing.
If ducking is useful, reduce the 808 only enough and only long enough to create the intended space. A dramatic pump is a creative effect, not proof of a correct mix.
A troubleshooting order that saves time
If the pitch is wrong, check root mapping before rewriting notes. If notes overlap, check voice count, note off response and release. If they stop early, check the source length and whether another note or choke group is cutting them. If they click, inspect abrupt waveform starts, ends and retriggers.
Bypass effects while diagnosing. Distortion can exaggerate a click that originates in the sampler, and reverb can disguise an overlap. Restore effects one at a time after the instrument behaves correctly.
Finish a playable 808 part
Build the four bar root pattern, verify three pitches with a tuner or reference instrument, and create clear rests through envelope control. Add one intentional slide and compare the line with and without a separate kick.
Save the clean version before adding saturation. Your finished exercise should have correct pitch tracking, predictable note endings and a recognizable rhythmic phrase. Those fundamentals make later sound design much easier to judge.
TAKE IT INTO YOUR OWN MUSIC
Your next session.
Build the four bar root pattern, verify three pitches with a tuner or reference instrument, and create clear rests through envelope control. Add one intentional slide and compare the line with and without a separate kick.
Notes and progress stay in this browser.