A studio monitor is a loudspeaker used to judge audio. Even an accurate monitor interacts with the desk, walls, ceiling, and floor. Moving it can improve what you hear more than replacing it with a more expensive model.
Draw the room before moving equipment
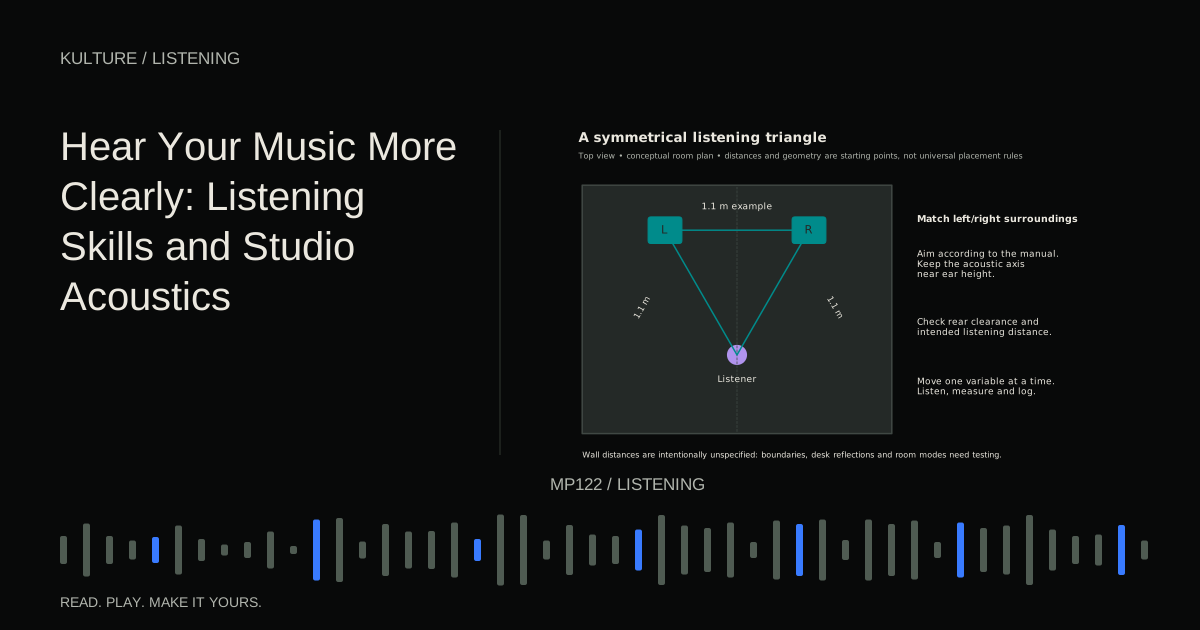
Sketch the room dimensions and mark doors, windows, radiators, closets, and large furniture. Identify practical layouts that allow the speakers to have similar surroundings. A symmetrical setup helps the left and right channels behave more consistently, which supports a stable centre image.
In a rectangular room, facing a shorter wall is a common starting arrangement because it leaves more distance behind the listener. It is not a law. An open doorway, an alcove, or an unavoidable desk can change the best compromise.
Do not block ventilation, exits, or access to equipment. If you rent or share the space, prefer reversible placement experiments before drilling or installing heavy supports.
TRY IT HERE
Move the listening position
Explore geometry, not a measurement of your actual room.
Ready when you are. Audio starts only when you press Play.
Keep experimenting in the piano LabBuild a stereo triangle
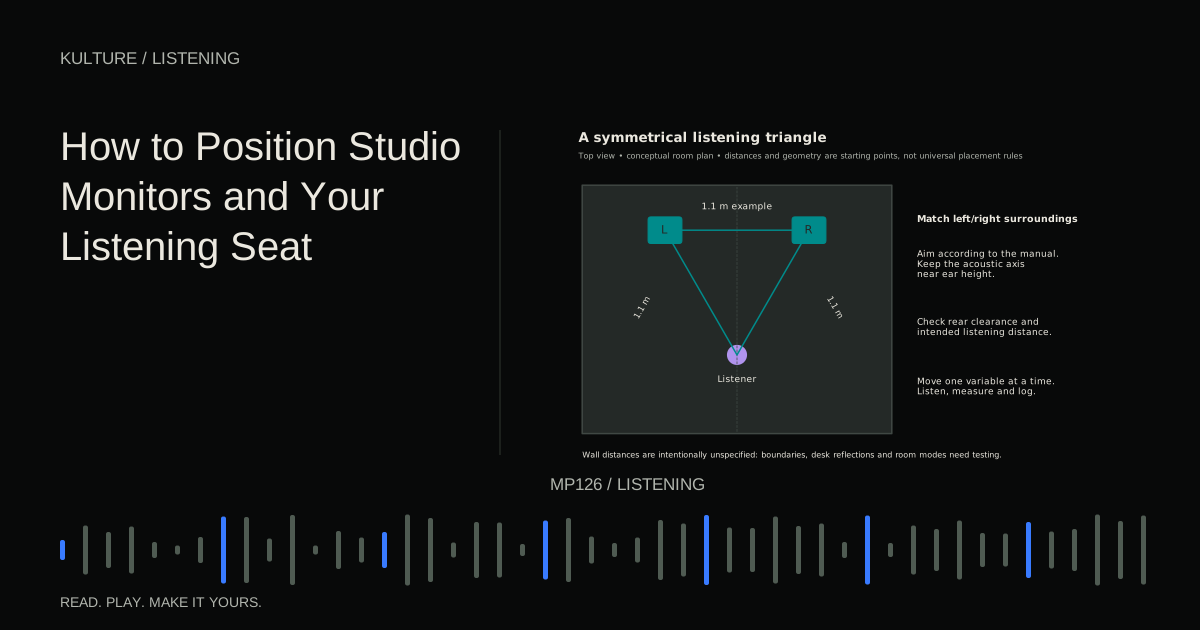
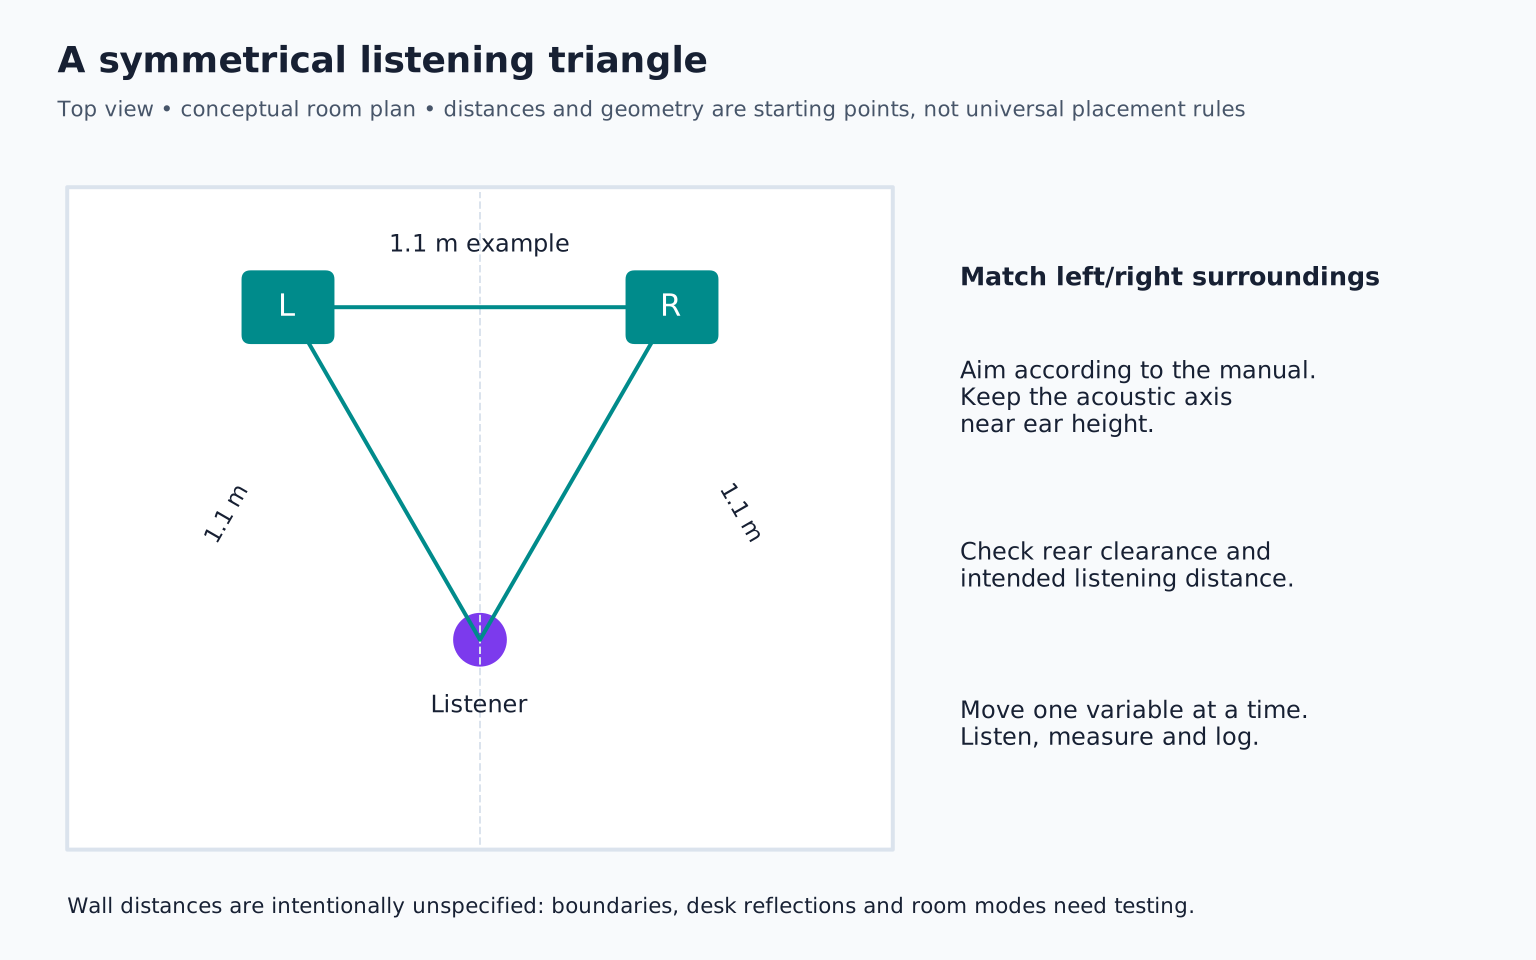
Place the speakers equally far from your listening position. Start with the speaker to speaker distance similar to the distance from each speaker to your head. For example, if the speakers are 1.1 metres apart, try sitting roughly 1.1 metres from each speaker, measured along the angled sides of the triangle.
This example does not mean every monitor is suitable at that distance. Check its intended listening range. Large multi driver systems may require more distance for the drivers to integrate properly.
Aim the speakers toward the listening area according to the manual. Put the intended acoustic axis near ear height. That axis is often near a tweeter or between drivers, but its exact location depends on the design. Do not automatically lay a vertically designed speaker on its side; orientation changes can affect dispersion.
Genelec's monitor setup guide provides diagrams and placement principles. Apply the geometry while following your own speaker's model specific requirements.
Understand why walls change bass
A nearby boundary reflects sound. The reflected and direct sound combine differently at different frequencies, sometimes reinforcing and sometimes cancelling. The frequency and depth of these effects depend on distance and geometry.
This is why “always pull speakers far away from walls” is incomplete advice. A distant placement can move a cancellation into an especially troublesome region. A close placement may reduce one problem while increasing bass reinforcement that needs appropriate compensation. Rear ports also need the clearance specified by the manufacturer.
Begin with a manufacturer supported placement, then test alternatives. Record the distance from the speaker's front baffle to the wall as well as the rear clearance. The baffle is the front surface carrying the drivers. Consistent measurement makes later comparisons meaningful.
Avoid corner placement for one speaker only. If a boundary related problem is asymmetrical, the stereo image may pull sideways even when the electrical levels are equal.
Reduce desk interference
A hard desk creates a nearby reflection path. Raising speakers on stable stands can help separate them from the desktop and allow better positioning. Stands must be rated for the load and secured against accidental tipping.
Isolation pads can reduce mechanical coupling in some setups, but they do not make the room acoustically invisible. They also cannot fix an unstable stand, a blocked driver, or a poor listening position.
Keep large displays out of the direct path. If a screen sits between the monitors, avoid pushing it so far forward that it creates a large reflective obstruction. Make small changes and listen before purchasing accessories.
Move the seat as well as the speakers
Room modes are resonances associated with the room's dimensions and boundaries. Their effect varies with location. The geometric centre of a simple rectangular room can be problematic for some bass frequencies, but a fixed percentage rule is not a universal solution either.
Mark the initial seat position. Move it perhaps 15 to 25 centimetres forward as a test, then backward by a similar amount. These distances are illustrative: the useful step size depends on the room. Keep the speakers fixed while comparing so you know which variable changed.
Use a familiar bass line and a recording with a clear central vocal. Ask whether note to note bass consistency improves and whether the vocal remains centred. Then measure the promising positions if you have suitable equipment. The room measurement guide explains a controlled approach.
A practical placement log
Suppose your desk begins against the short wall of a small rectangular room. Label that setup A. Write down speaker separation, baffle to wall distance, speaker height, toe in, and seat position.
Create setup B by moving both monitors together, keeping their separation and symmetry unchanged. Listen at the same level. Do not simultaneously add EQ or change the bass port settings.
If B improves bass consistency, try setup C with a modest seat movement. If C improves one note but makes several others disappear, keep B. The goal is a useful overall compromise, not the biggest bass response or a perfect result at one frequency.
Photograph each setup and keep its measurements. Memory alone is poor at comparing changes made several minutes apart.
Add treatment after the free improvements
Once placement is reasonably stable, identify early reflection paths and low frequency decay problems. Appropriate absorption may help, but thin decoration is not equivalent to broad band treatment. Genelec's acoustic guidance discusses controlling reflections and considering the whole room.
Treat equivalent left and right reflection areas where practical. A very different treatment pattern on each side can undermine the symmetry you worked to establish. Use suitable mounting hardware and follow material safety instructions.
Correction EQ can help some response problems, especially peaks, but it cannot eliminate every cancellation or make long decay disappear. Do not apply huge boosts to fill a deep acoustic null. That can consume amplifier and driver headroom without solving the geometry.
Check the result with real music
Listen to several known recordings rather than only sweeps. A useful setup should make decisions more consistent: the same bass note should not mysteriously vanish each time you lean slightly, and a centred vocal should not wander.
Your exercise is to document three reversible layouts, changing one variable at a time. Choose the most consistent, then make a short mix and compare it elsewhere. If translation improves, the placement work is paying off. Continue with treatment versus soundproofing before deciding what to buy.
TAKE IT INTO YOUR OWN MUSIC
Your next session.
Suppose your desk begins against the short wall of a small rectangular room. Label that setup A. Write down speaker separation, baffle to wall distance, speaker height, toe in, and seat position.
Notes and progress stay in this browser.