You can comp vocals, guitar, bass, and many other sources. Most DAWs provide take lanes, playlists, or similar systems. The names vary, but the underlying job is the same: preserve alternatives, audition them fairly, select regions, and make the transitions believable. Ableton's comping overview describes this composite take approach.
Make takes that can fit together
Keep microphone position, input gain, instrument setup, and monitoring reasonably consistent. If the singer moves from close to distant between takes, matching words may also require matching bass response and room sound. A level adjustment cannot fully correct that change.
Tune the instrument before recording, and check it again if the session is long or the room changes. Keep the backing arrangement stable enough that the performer reacts to the same musical cues. If you change the groove halfway through, older takes may phrase against a different feel.
Record a count in and space after the last phrase. These handles give you room to choose edit boundaries and retain decays. Avoid stopping recording at the exact instant the last word finishes.
TRY IT HERE
Make it your session
Turn the steps into a plan you can save.
Ready when you are. Audio starts only when you press Play.
Keep experimenting in the sample pads LabCapture complete passes before isolated fixes
For a sixteen bar verse, record three complete passes. The first may establish the idea, the second may feel freer, and the third may contain a stronger ending. There is no required number: stop when you have useful choices or the performer needs a break.
Name or comment on takes immediately. “Take 2, best first half, rushed final line” is more useful than “good.” Mark the moment rather than making the singer listen to every tiny problem between passes.
If one line consistently fails, record a targeted pickup. A pickup is a replacement for a limited section. Start playback a bar or two before it so the performer hears the lead in and delivers the line in context. Record beyond the line's end to preserve the transition into the next phrase.
Do not delete failed takes automatically. A take with a bad opening can contain the best later phrase. Keep originals until the final edit is checked and backed up.
Choose a base take with your ears
Listen to each full pass without watching the waveform closely. Rank expression, timing, intelligibility, and continuity. Pitch and small noises matter, but they should not automatically outweigh a performance that communicates the song.
Choose one base take. Then make a short repair list: “second line enters early,” “word missing at bar 9,” “last note loses support.” This keeps comping from becoming endless browsing.
Compare alternatives over enough surrounding music to hear their direction. A word that sounds beautiful alone may enter with the wrong intensity. A sustained note may be accurate but have a vibrato character that clashes with the phrase it joins.
A practical four line comp
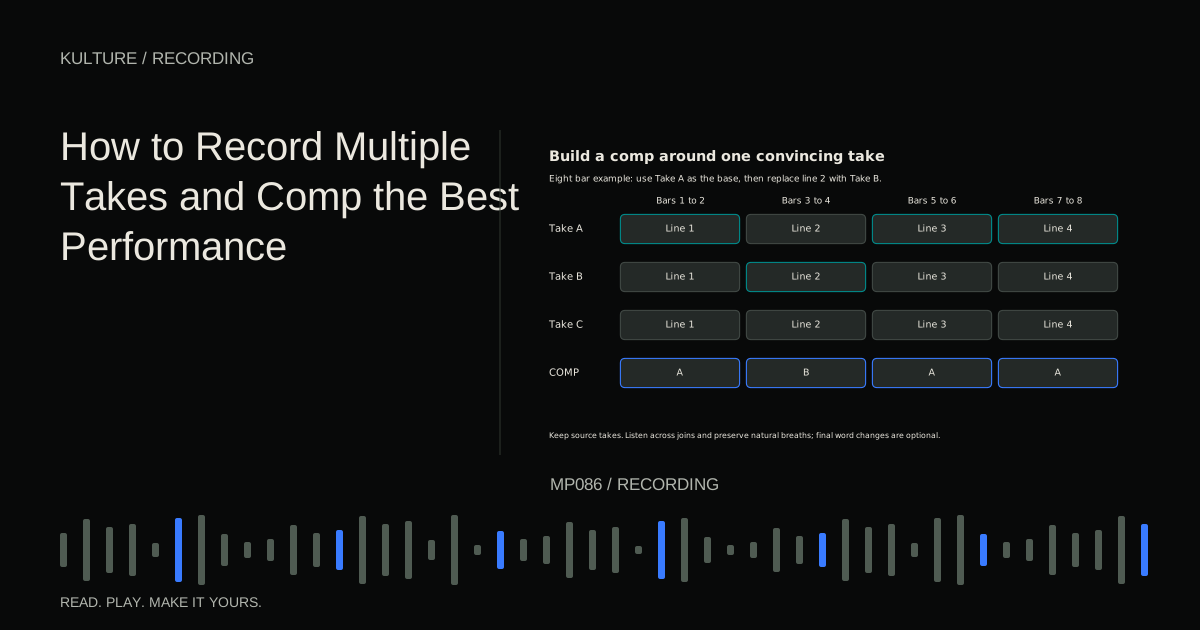
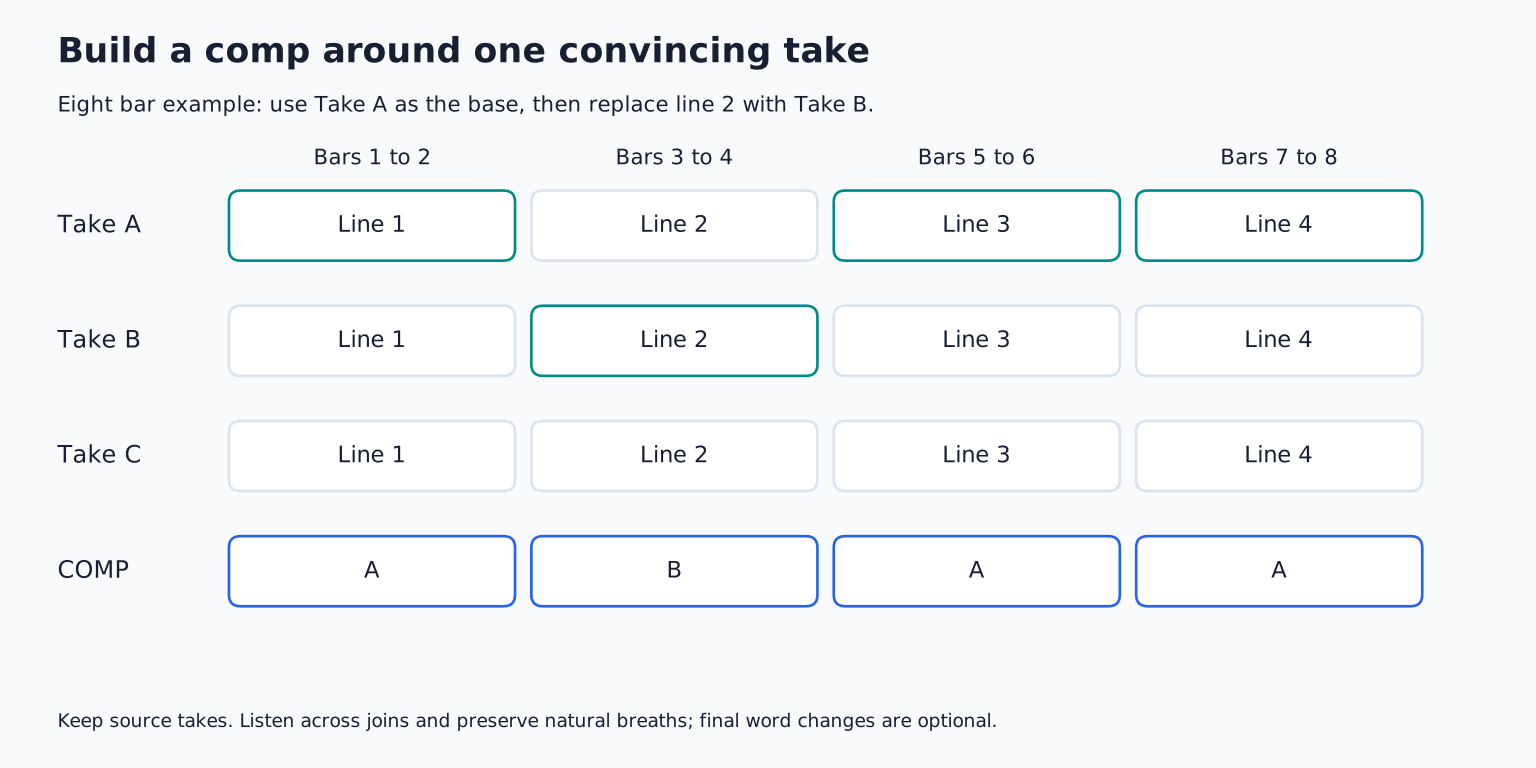
Suppose your verse has four lines, each two bars long. Take A has the best overall feel. Take B has a clearer second line. Take C has a stronger final word.
First copy or promote Take A to the main comp. Replace line two with the whole corresponding phrase from B, including its natural breath if that breath belongs to the delivery. Listen from line one through line three. Only when that transition works should you consider replacing the final word from C.
For the final word, check whether the preceding consonant or vowel transition crosses the proposed cut. If the singer connects the words, replacing the entire short phrase may sound more natural than slicing the final word alone. Smaller edits are not inherently more professional.
Keep the original take lanes available underneath or in a protected copy. That makes it easy to reverse a choice after hearing the full song.
Put boundaries where the performance allows
A low level gap is often an easy place to join takes, but silence is not the only possibility. Sustained material can be joined if pitch, tone, and waveform behaviour cooperate. It simply requires more listening.
Avoid cutting through the attack of a consonant, pick stroke, or drum hit unless you intend to reshape it. Do not leave both versions of a consonant overlapping, which can create a stutter. Watch for a breath that begins in one take and ends in another with a sudden change of room tone.
Use short fades or crossfades to prevent abrupt discontinuities. A crossfade turns one region down while another comes up. Start with a brief transition, listen, and adjust its length and shape to the material. A longer crossfade can smooth ambience but may blur two different vocal pitches. Fades and crossfades covers that tradeoff.
Match level without hiding tonal problems
If the chosen line is slightly louder, adjust its clip gain before reaching for a compressor. Compare in the full phrase, because a deliberate accent should not always be flattened to match its neighbours.
If the line sounds thinner, brighter, or farther away, investigate the source take. It may have been recorded from a different position. A little equalization can help, but a more compatible performance may be a better edit than extensive processing.
For vocals, comp before detailed pitch correction when practical. Otherwise you may spend time tuning material that you later discard. Keep a clean pre tuning version so you can revisit the performance decisions separately from the correction.
Multi microphone recordings need linked edits
If one guitar or drum performance was recorded through several microphones, those tracks represent the same event at different positions. Editing only one microphone can change their time relationship and cause tonal changes when combined.
Group related tracks and move their edit boundaries together. When choosing a different drum take, normally choose the corresponding segment across all drum microphones, not a snare hit from one performance under overheads from another. Bleed and cymbal decay can expose the mismatch even when the main hits line up.
For a full band recording with extensive bleed, comping may need to happen across the whole ensemble. A technically clean individual replacement can still conflict with the old performance audible in other microphones. See recording a band live for ways to plan around this.
Know when editing has gone too far
Listen away from the edit screen. Does the singer still seem to take a plausible breath? Does a guitar phrase keep its momentum? Does the intensity rise through the section, or reset at every splice?
If you are comparing tiny alternatives without a clear improvement, return to the base take. Keep a separate version of the detailed comp so you can compare, but do not assume more edits justify themselves.
For practice, comp one eight bar section from three takes using no more than three replacements. Add appropriate transitions, match obvious level jumps, and listen through the entire section twice without stopping. Then compare it with the best unedited take at similar loudness. Keep the comp only if it improves the musical result. The next useful skill is vocal cleanup, applied after the performance choices are settled.
TAKE IT INTO YOUR OWN MUSIC
Your next session.
Suppose your verse has four lines, each two bars long. Take A has the best overall feel. Take B has a clearer second line. Take C has a stronger final word.
Notes and progress stay in this browser.